In this article, we’ll be running through the process, step by step, of adding & amending a product in your WordPress website. To allow a WordPress site sell products online, we’re assuming your site is using WooCommerce, the official online shop extension for WordPress.
For ease of use we will be running through adding a ‘Simple Product’ – so no variations. We do have an article on adding and amending variable products, but we’d advise you master this process first.
Before we begin, this guide also assumes that you have access to your website’s back office and are already logged in. We start the guide from the admin dashboard.
If you don’t have access, please contact your site administrator or web developer.
Heading to the ‘Products’ section
First off, we need to head over to the ‘Products’ section within your website.
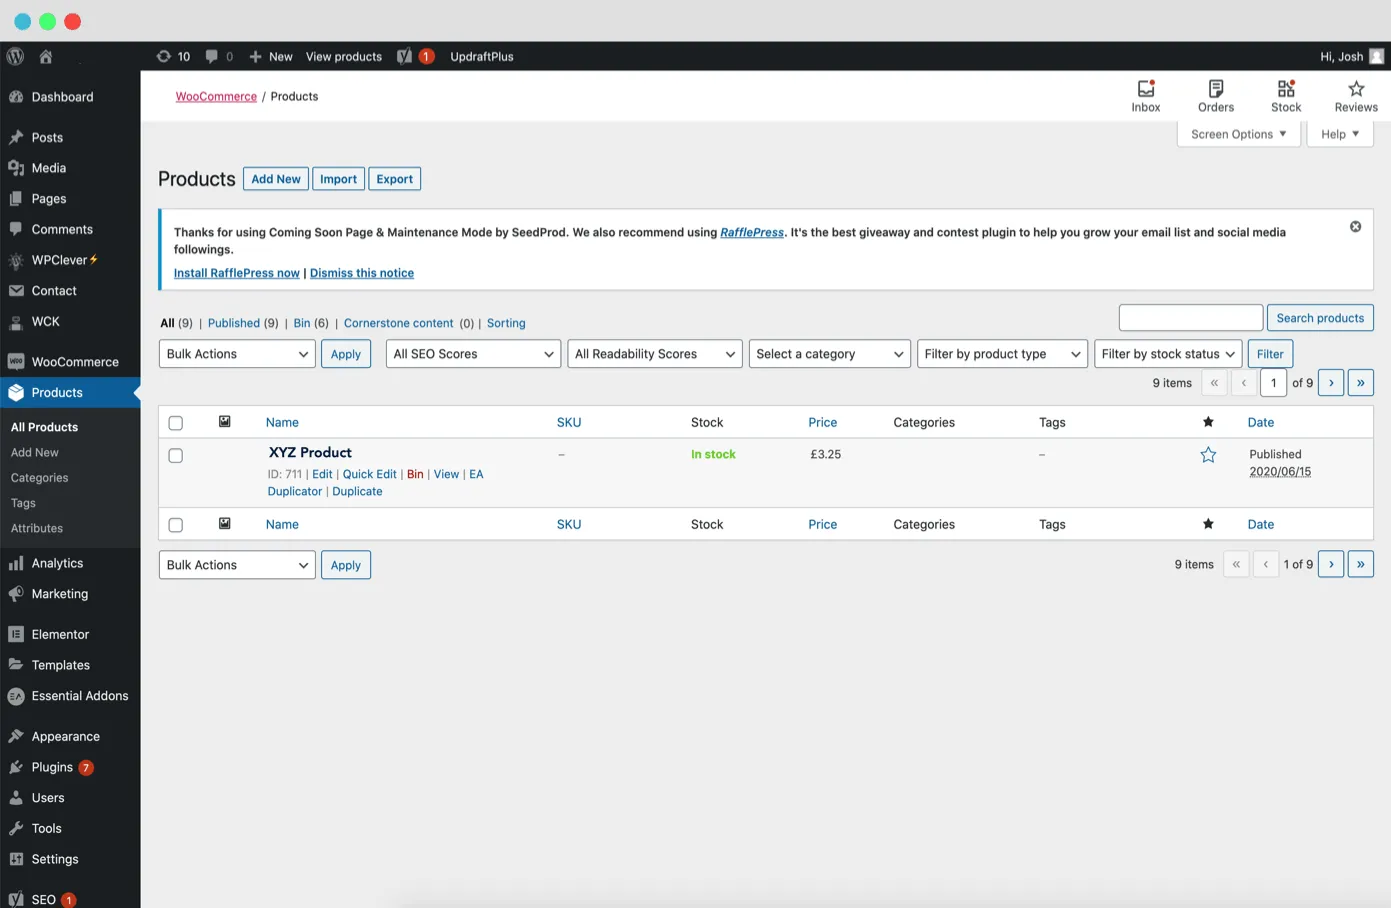
This can be found in the left hand navigational column under the label of ‘Products’ – please see figure #1 below.
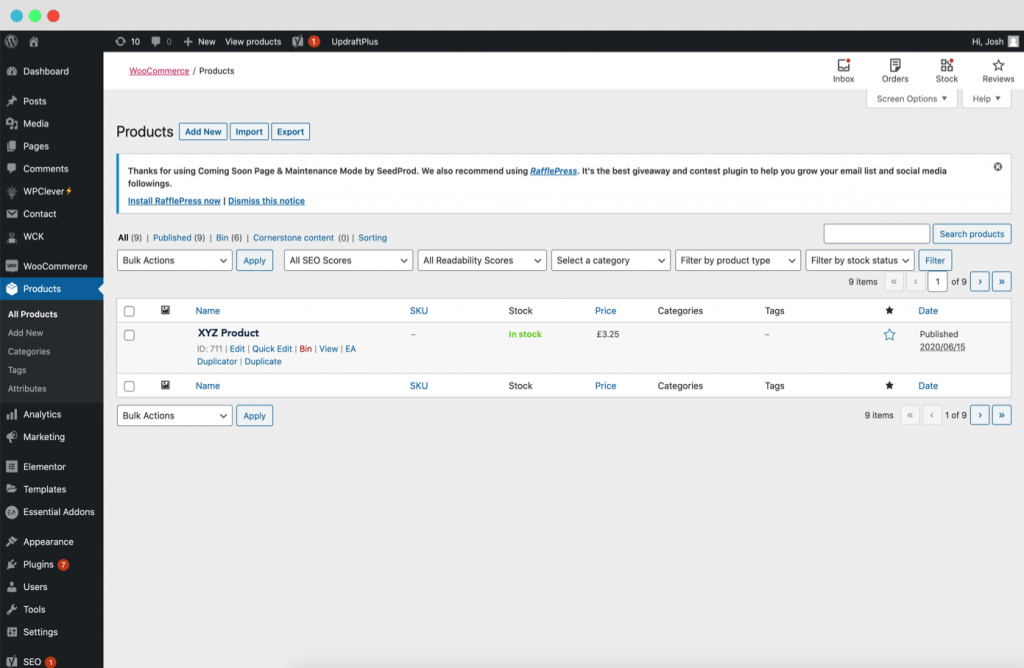
Figure #1: The WooCommerce main product page
You can click ‘Products’ or when you hover over ‘Products’ you can also click ‘All Products’ – both will take you to the same place.
Once here, you will see all of the products currently on your website in a table format.
Adding a new product
From the ‘Products’ main page (figure #1) you need to click the ‘Add New’ blue button near the top.
You should then be confronted with a page that looks similar to figure #2 below.

Figure #2: Adding a new product in WooCommerce
What to fill out
Below we’ll discuss the key aspects you’ll need to fill out in order to get your product live. While this is not exhaustive, it will give you all you need to get your product live and looking good.
Figure #3 below shows the key areas annotated in red that you will need to fill out.
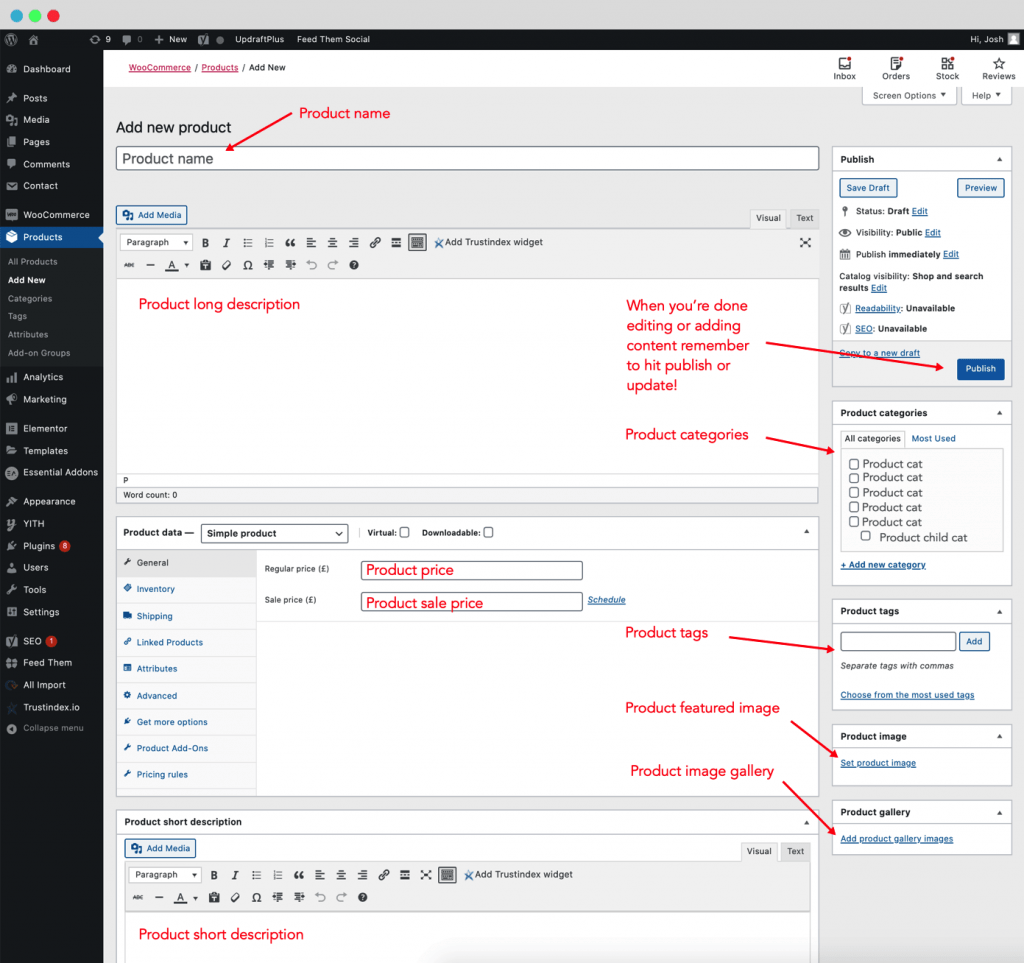
Figure #3: Adding a new product in WooCommerce with annotations
Title & descriptions
The title is found at the top of the page. The long description is the ‘normal’ or first WYSIWYG (What You See Is What You Get) editor. The short description is again a WYSIWYG editor but found below the ‘Product data’ section – shown at the bottom of figure #3.
It’s not obligatory to fill out the short and long description. However, from a user’s perspective, it makes understanding your product much easier, not to mention the benefits they bring to SEO (Search Engine Optimisation).
Price
All you’ll need to enter is the ‘Regular price’, but you will have the option to set a sale price, should you wish.
Stock
Found in the ‘Product data’ section, first you’ll need to select the ‘Inventory’ tab in the left hand column, then either check ‘Managed stock?’ or leave it unchecked.
Managed Stock
By checking the ‘Managed stock?’ option, three inputs will appear. The main one you’ll need to concern yourself with is ‘Stock quantity’. Just enter the number of stock you have for that product.
Figure #4 below shows ‘Managed Stock?’ checked and the three inputs below.
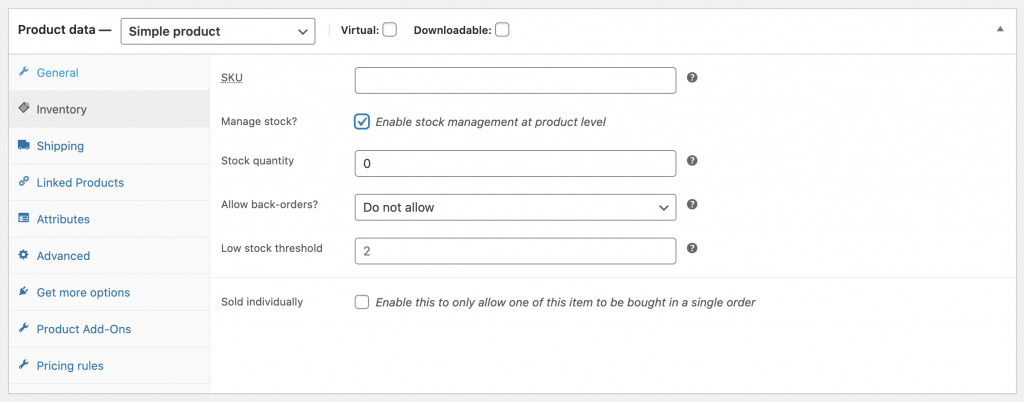
Figure #4: Selecting managed stock
Generic ‘In stock’
If you have, in theory, an unlimited amount of stock you may wish to not enable stock management and just opt to have the ‘Stock status’ show that the product is ‘In stock’.
Figure #5 below shows ‘Managed Stock?’ unchecked and the select option of ‘In stock’ selected.
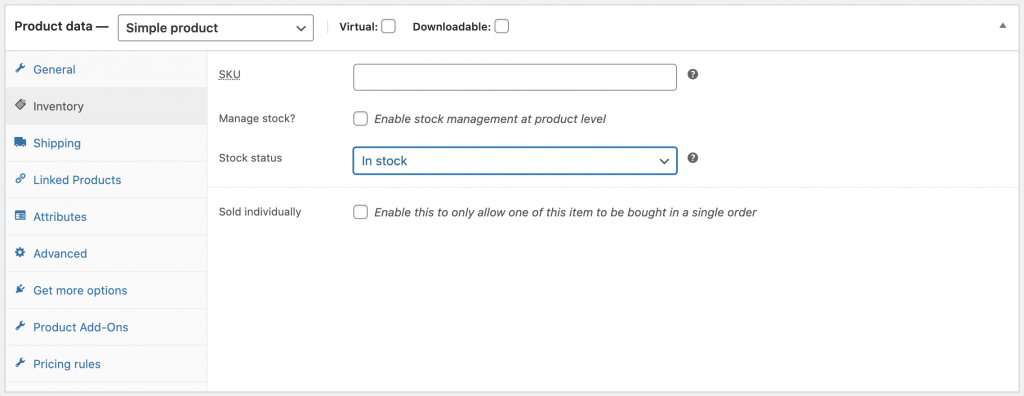
Figure #5: Selecting a generic stock status
Images
The key image you’ll want to upload is the ‘Product image’. This is found in the box called ‘Product image’. Click the link ‘Add Product Image’ and you’ll be confronted with this popup below (figure #6).
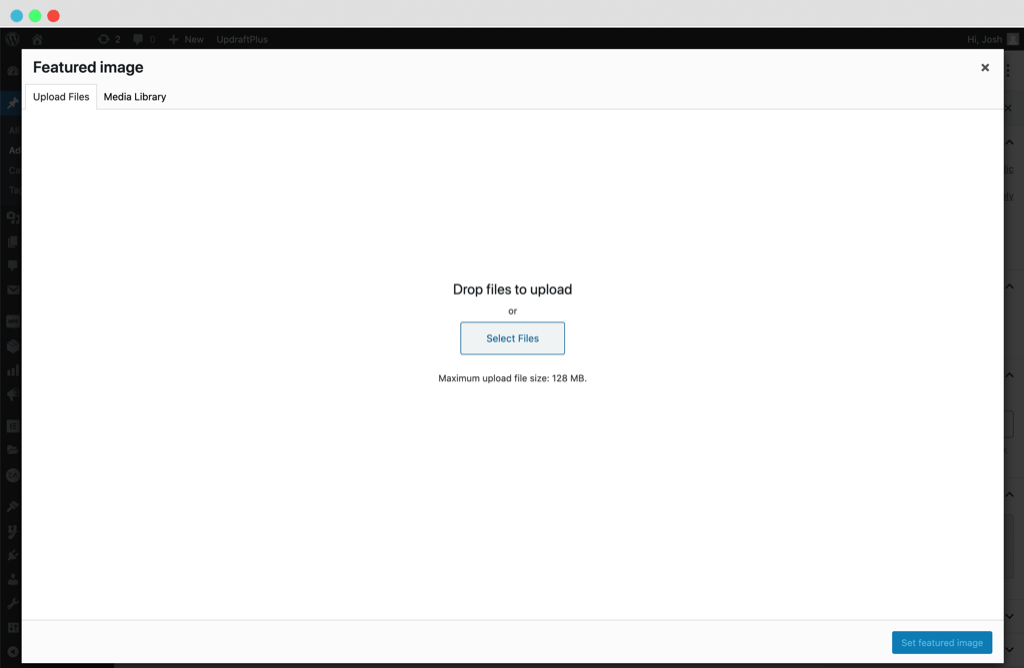
Figure #6: Uploading an Image in WordPress
You can drag and drop images from your machine into this popup and they will automatically upload to the site’s media folder. Or you can hit the ‘Select Files’ button and it will open your device’s documents.
Once you’ve uploaded the image, you’ll be automatically directed to the ‘Media Library’ tab (still within the popup) where you can select the desired product image.
Next simply click ‘Set product image’ – the blue button at the bottom right of the screen.
Gallery images
You can upload multiple images, in a similar format to the above, but in the section below ‘Product Image’. These gallery images appear below the main image in the front-end
Categories & tags
Both categories and tags are what’s known as taxonomies, which are used for sorting and ordering your products.
There’s a nice, simple article by WordPress.com which goes into the difference between tags and categories; but in general, categories are for categorising by broad topics, tags are for specific topics.
Categories
To add a category to your product, in the box provided simply check the categories you would like the product to be attributed to. You may also add new categories, for this see figure #3 above – the text that says ‘Add new category’.
Tags
Below the categories box (figure #3) you’ll find the tags input. Simply type in your word or phrase in the box provided – if the tag has already been created it will appear in a results box below, if not, you’ll need to hit ‘Enter’ on your keyboard to create the tag.
Hitting publishing
Once you are done adding the content and filling out other aspects, all you need to do is hit ‘Publish’ in the top right hand corner to make your product live!
It’s important that you do otherwise none of your work will be saved in the database.
Side note: you can press ‘Preview’ to view the product in the front-end before it goes live, which we recommend.
Amending/ Editing a product
When you’ve got a few products live, here’s what you will need to do to amend or edit them.
First up, head over to the main ‘Products’ page – figure #1 above, from the beginning of this guide.
Once there, hover over the product you wish to edit and press the ‘Edit’ link – see figure #7 below.
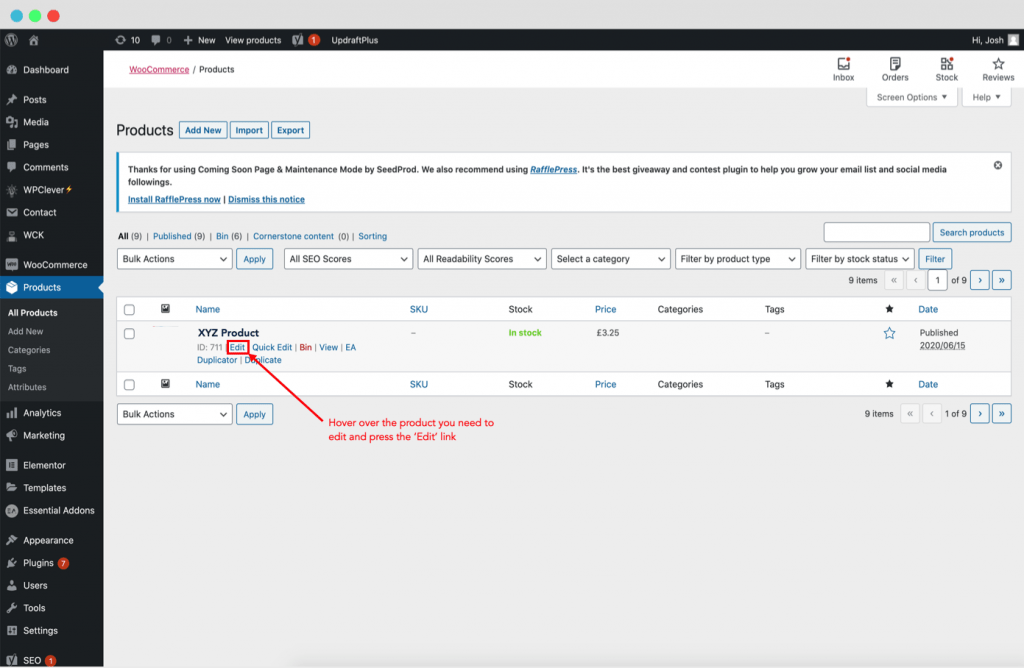
Figure #7: Editing a product in WooCommerce
Now you’ll be taken to the actual product’s editing page where you can change the title, categories, price etc. This is done in the same format as we’ve just run through in the ‘Adding a new product’ section of this guide.
Key tip: remember to click ‘Update’ in the top right hand corner to save and update your edits!
Deleting a product
Similar to editing a product, you’ll need to navigate to the main ‘Products’ page. This is where you’ll find a table of all your website’s products – figure #1 above.
Once there, hover over the product you wish to delete and click ‘Bin’ – figure #8 below.
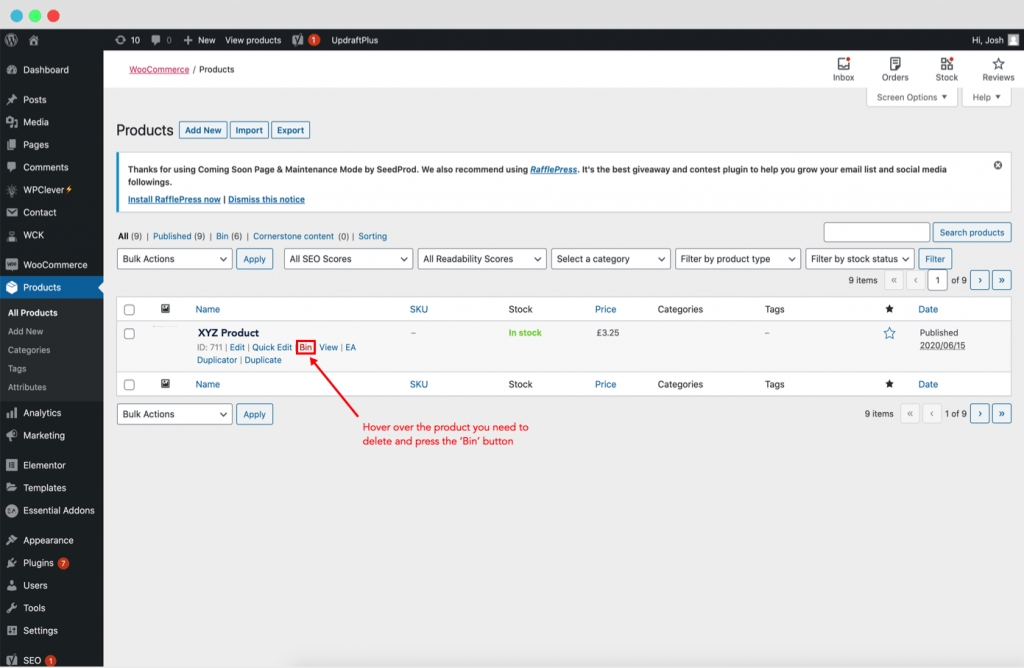
Figure #8: Deleting a WooCommerce Product
Once a product is in the ‘Bin’, the product will be permanently deleted in 30 days.
Restoring a product
If you’ve moved a product to the ‘Bin’ by mistake, you can restore it providing you do so within 30 days.
Hit the tab along the top of the product table that says ‘Bin’ (next to ‘All’ & ‘Published’), then hover over the product you wish to restore and simply click ‘Restore’ – See figure #9 below.
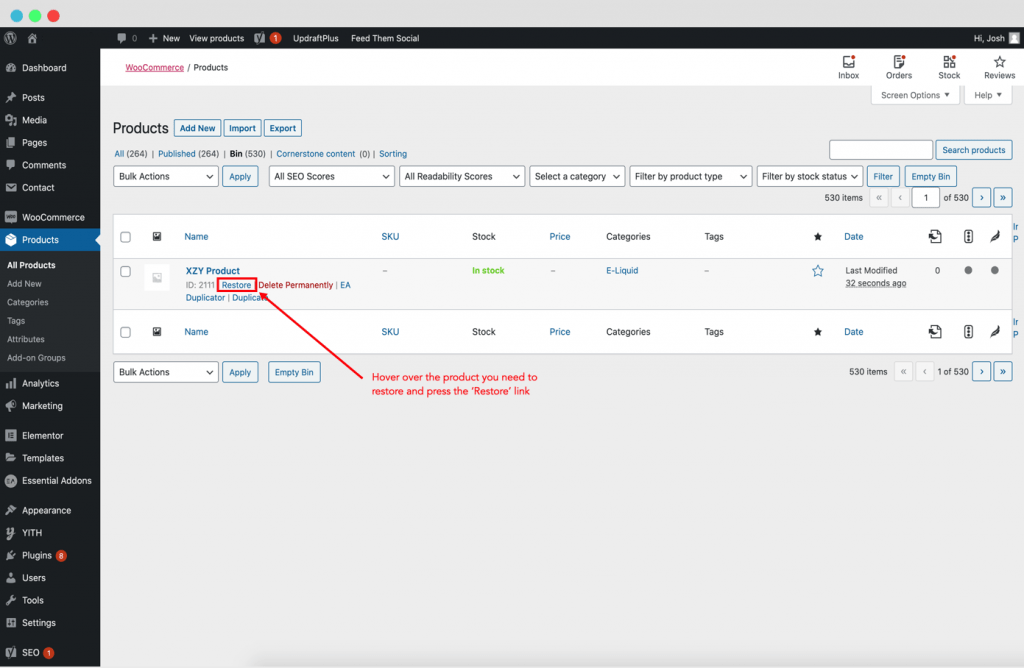
Figure #9: Restoring a deleted or ‘Binned’ product
Happy blogging!