Today, we’ll be running through the process of adding & amending a blog post in your WordPress website.
This guide assumes that you have access to your website’s back office and are already logged in. We start this guide from the admin dashboard.
If you don’t have access, please contact your site administrator or web developer.
Heading to the ‘Posts’ section
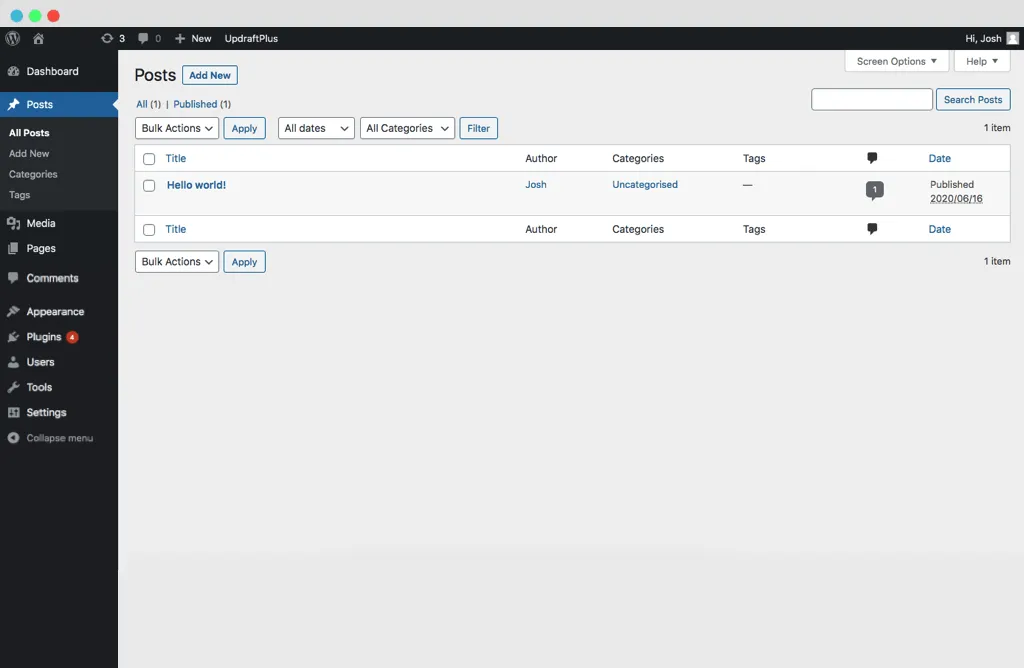
First off, we need to head over to the ‘Posts’ section within your website.

Figure #1: The WordPress Posts section
In the the left-hand black navigation bar, you’ll need to either click directly on ‘Posts’, or as you hover over it, you should see the option of ‘All Posts’.
Both will take you to the same place (figure #1 – above).
From this page you can easily see all the blog posts currently on your website.
Adding a new post
On the ‘Posts’ main page you’ll see the words ‘Add New’ in a blue button. ‘Add New’ can also be found in the sub-menu in the left-hand side black navigation column.
Once clicked, you should come to a page looking like this: (figure #2 – below).
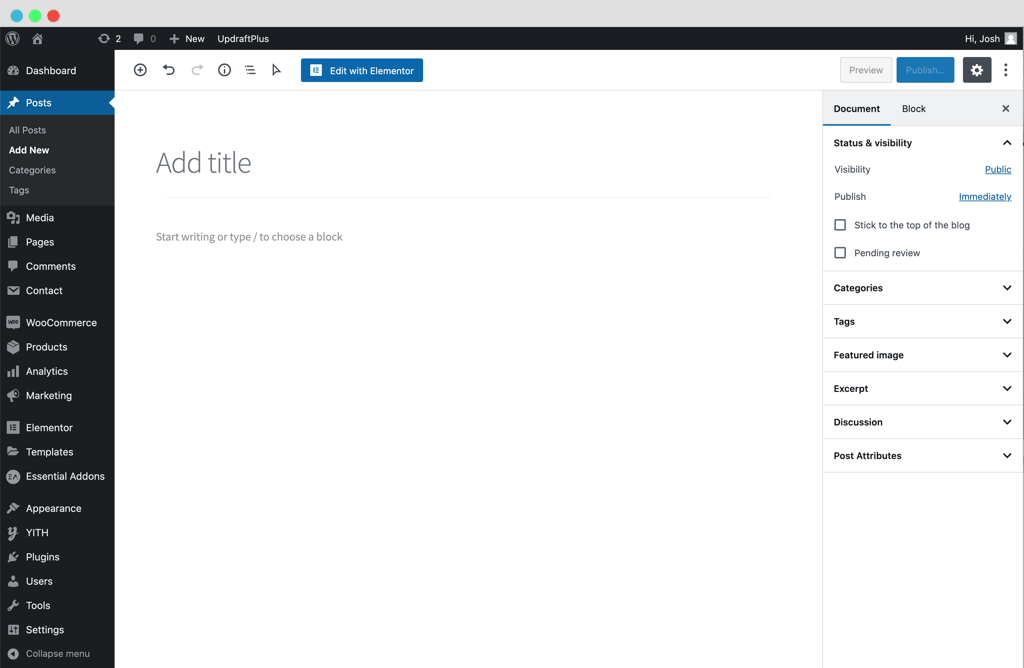
Figure #2: WordPress Add New Post
As it’s important to keep your website up to date, we’re showing you the Gutenberg editor (opposed to the classic editor), which has been around since WordPress version 5.0.0.
Now that we’re on the same page (pun intended), we’ll run through the essential information you should fill out in order to get your blog post looking good and published live!
What to fill out
Here are the essentials…
Post title
Pretty self explanatory, this is the title of your blog post.
Figure #3 below shows the where you should add your title (and body content) highlighted in red.
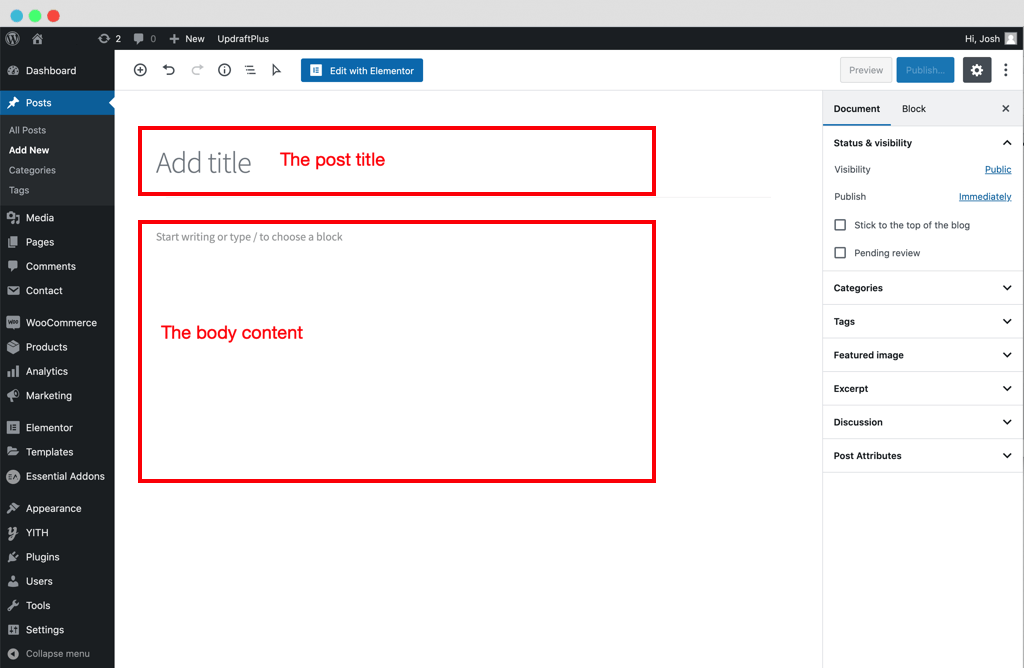
Figure #3: WordPress post title and content highlighted in red
Body content
This is your post’s actual content, so the words/copy you want people to read.
Again referencing figure #3 above, the body content is highlighted in red.
Simply just start typing and you’ll be using the famous, native, Gutenberg editor.
Side note, here’re some top tips on using the Gutenberg editor.
Categories & tags
Both are taxonomies used for sorting and ordering your blog posts.
There’s a nice, simple article by WordPress.com which goes into the difference between tags and categories; but in general, categories are for categorising by broad topics, tags are for specific topics.
Categories
To add a category to your blog post, in the right-hand column, press ‘Categories’. You should now see a small section below the word ‘Categories’ appear where you will have the option to check which categories this blog post should belong to or add new ones. See Figure #4 below highlighted in red.
Tags
Similar to ‘Categories’, click ‘Tags’ in the right-hand column. Type your word or phrase in the box provided – if the tag has already been created it will appear in a results box below where you’ve been typing, if not, you’ll need to hit ‘Enter’ on your keyboard to create the tag. See Figure #4 below highlighted in red.
Can’t see either of these options?
Make sure at the top of the right-hand column you’ve got the tab ‘Document’ selected.
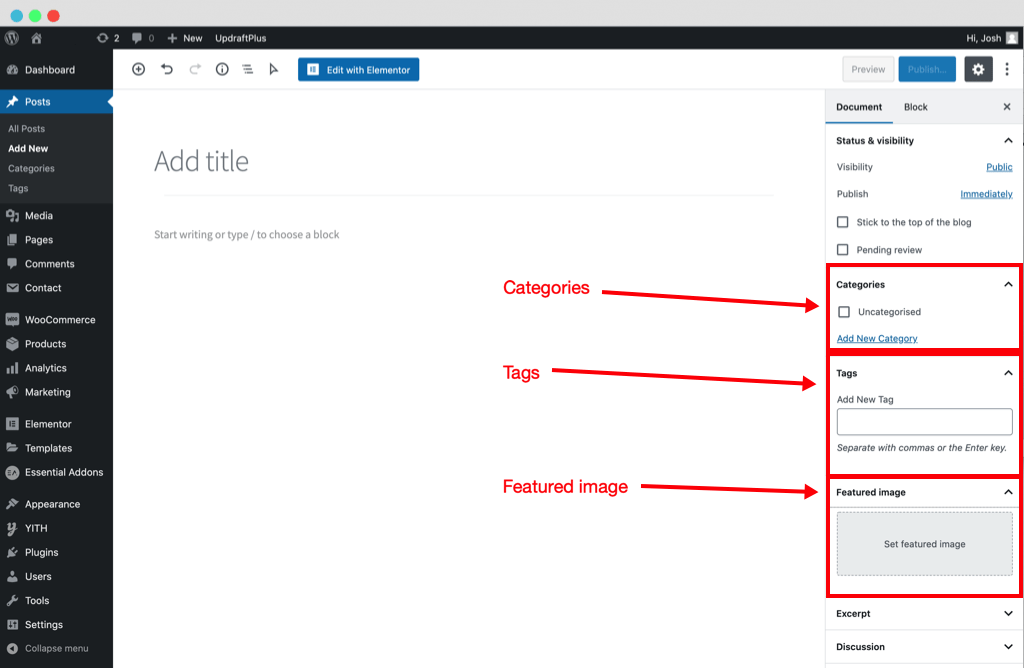
Figure #4: WordPress categories, tags and featured image highlighted
Featured image
Adding a featured image to your blog post will enhance your site visually and should improve its search engine ranking.
In figure #4 above, the section where you upload the featured image is highlighted in red.
Simply press ‘Set featured image’ and this popup will appear (figure #5 below):
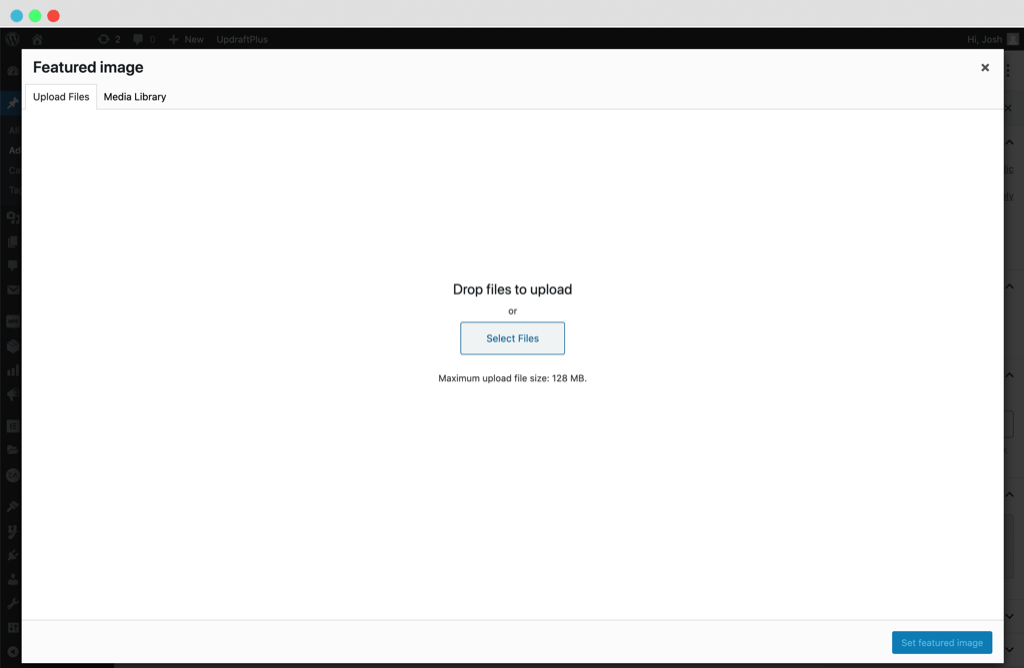
Figure #5: Uploading an image in WordPress
You can drag and drop images from your device into this page and they will automatically upload to the website’s media folder. Or you can hit the ‘Select Files’ and it will open your PC/Laptop’s documents.
Once you’ve uploaded the image, you’ll be automatically directed to the ‘Media Library’ tab (still within the popup) where you can select the desired featured image.
Next click ‘Set featured image’ – the blue button at the bottom right of the screen.
Hitting publish (and saving drafts)
Once you’re happy with the title, content, featured image, categories and/or tags it’s time to hit ‘Publish’ and make your blog post live for the world to see!
This is a blue button and can be found in the top right-hand corner of the screen.
Saving drafts
WordPress saves drafts periodically. However, it’s a good idea to save drafts manually every so often and especially if you’re going away from your desk or your internet connection is poor to avoid losing your work.
To do this press the words ‘Save Draft’ in the top right hand corner of the page. Please note: if your post has already been published, saving a draft will ‘Unpublish’ the post!
Amending/ Editing a post
Assuming you’ve now got a few blog posts set up, we’ll show you how to amend or edit them.
First up, head over to the main ‘Posts’ page – figure #1 above, from the beginning of this guide.
Once there, hover over the post you’re looking to edit and press the ‘Edit’ link – figure #6 below:
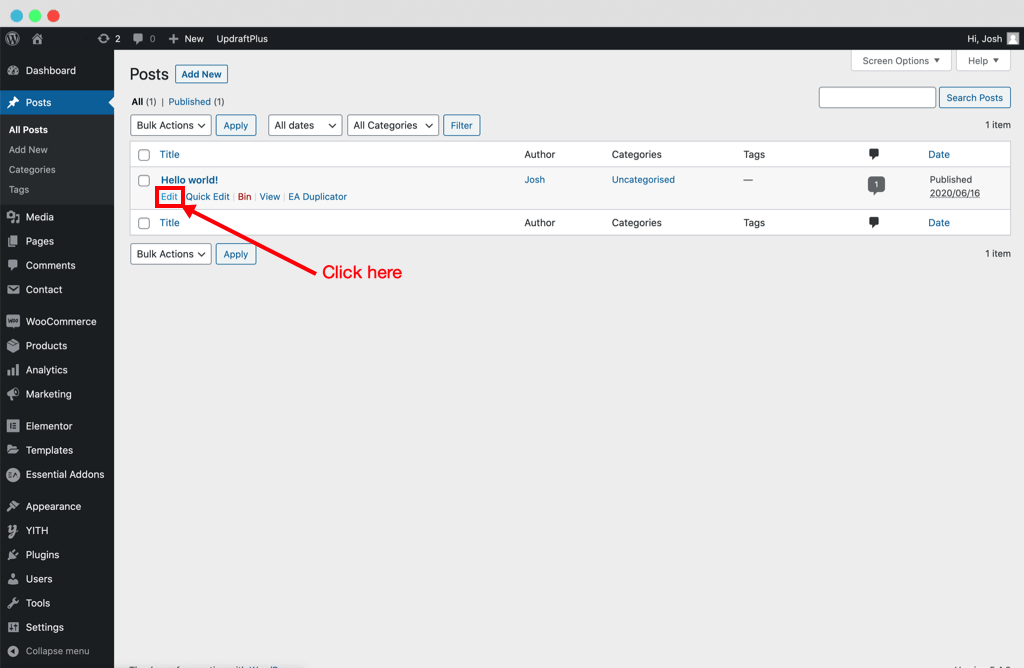
Figure #6: WordPress edit post
Now you’ll be taken to the actual post’s editing page where you can change the title, content, categories etc. which are in the same format as we’ve just run through in the ‘Adding a new post’ section of this guide.
Remember to click ‘Update’ in the top right hand corner to save and update your edits!
Deleting a post
Similar to editing a post, you’ll need to navigate to the main ‘Posts’ page – figure #1 above.
Once there, hover over the post you want to delete and click ‘Bin’ – figure #7 below.
Once a post is in the ‘Bin’, the blog post will be permanently deleted in 30 days.

Figure #7: Moving a post to ‘Bin’
Restoring an article
If you’ve moved a post to the ‘Bin’ by mistake, you can restore it providing you do so within 30 days.
Hit the tab along the top of the posts table that says ‘Bin’ (next to ‘All’ & ‘Published’) then hover over the post you wish to restore and simply click ‘Restore’ – See figure #8 below.
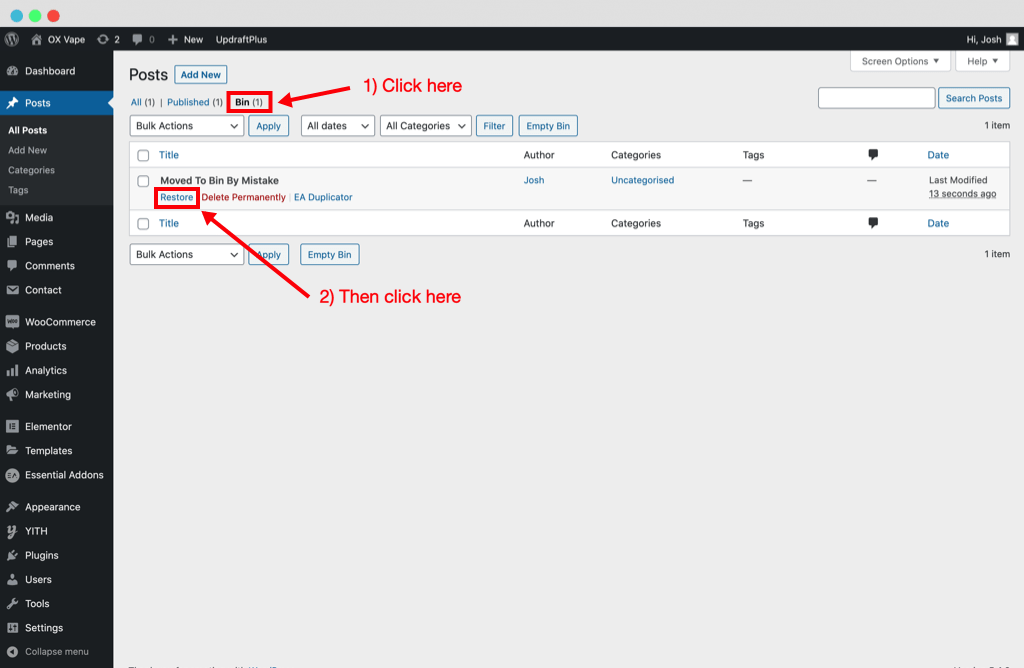
Figure #8: Restoring a deleted post in WordPress
Good luck and happy blogging!