This article expands on our previous WooCommerce ‘How To’ article where we run through adding and amending a ‘Simple product’ to your WooCommerce [WordPress] online shop. If you are unsure on how to do this, please do take a look at that article, because we will be picking up from it.
Also, before we proceed, this article assumes that you have access to your website’s back office and are already logged in, as we start the guide from a product editing page.
Transforming from ‘Simple product’ to ‘Variable product’
Variable products work differently from simple products by making practical use of product attributes. The attributes can be used to create variations. For example, a product may have three attributes: ‘Red’, ‘Blue’, ‘Green’. Now, these attributes can be used in creating variations which will allow customers to select the variation of the product they wish to purchase.
So let’s get down to it….
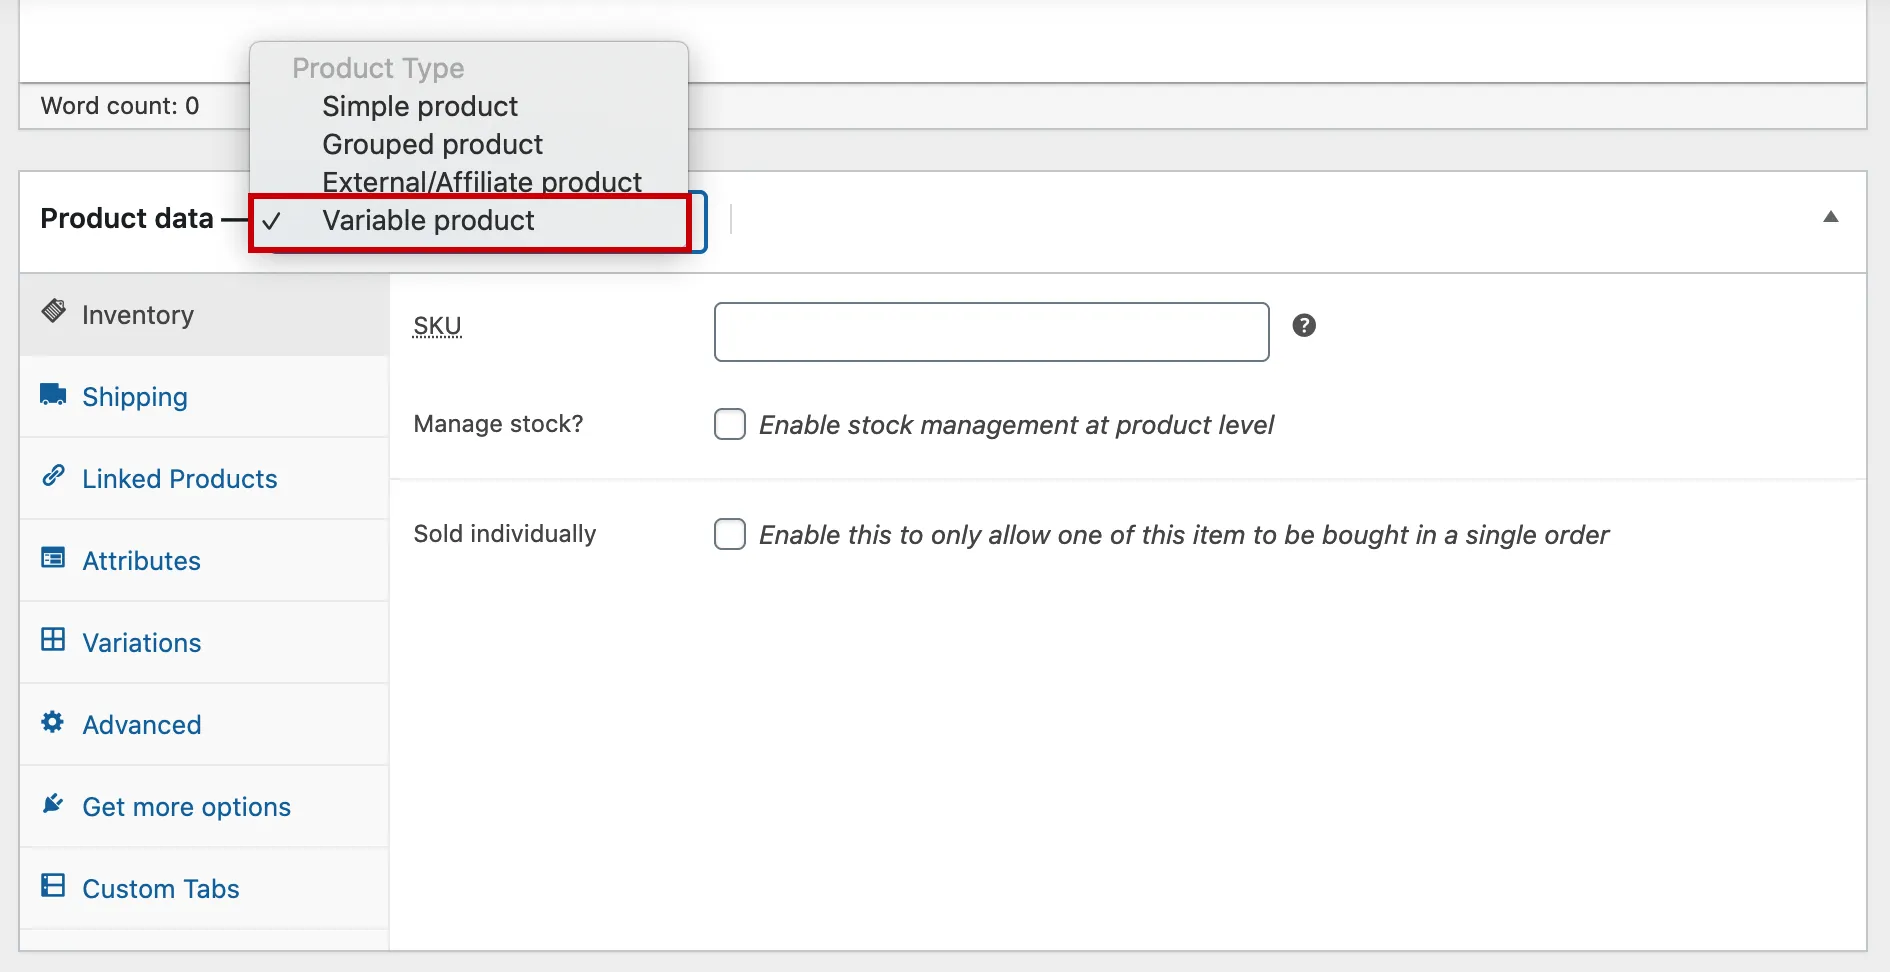
The first thing you’ll need to do is navigate down to the ‘Product data’ section. In the top part of that section there is a select box which says ‘Simple product’ by default. You need to change this to ‘Variable Product’ (figure #1 below). Once done, the tabs will change slightly – you’ll loose the ‘General’ tab and gain ‘Variations’.

Figure #1: Selecting a ‘Variable product’ in WooCommerce
The next step is to set up attributes.
Setting up attributes
There are two ways in which you can set attributes: globally or locally.
Global attributes should be used if the variations are or can be shared amongst your other products. Local attributes should be used if the attribute is unique to the product.
Local attributes
Navigate to the ‘Attribute’ tab in the ‘Product data’ section. Once there, you’ll need to select ‘Custom product attribute’, then click ‘Add’.
That will bring up something that looks similar to figure #2 below.
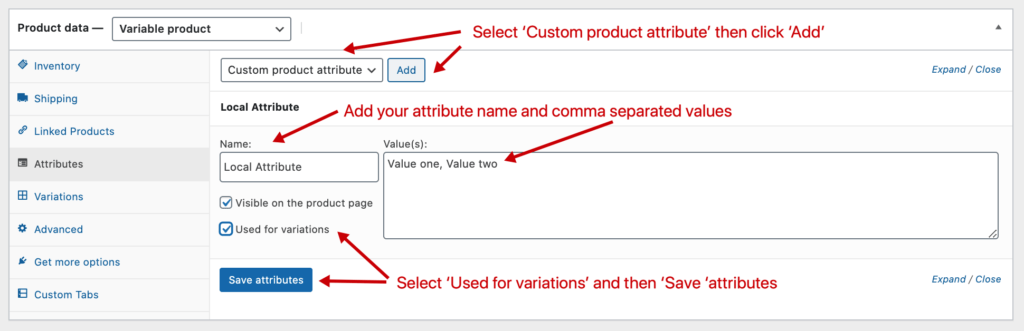
Figure #2: Adding a local attribute
Proceed to fill out the info as described in figure #2. This is includes adding the attribute name, values separated by commas and checking the checkbox ‘Used for variations’.
Then, hit ‘Save attributes’.
Global attributes
Just a heads up, global attributes tend to perform better as they can be easily filtered on product pages.
To add global attributes to products, you’ll first need to configure the terms (values) in a different part of the back office. In the left hand menu, you need to navigate to Products > Attributes – however, before you do, remember to hit ‘Save draft’ or ‘Update’ if you’ve made changes!
When you’re there, type in the name of the attribute and hit ‘Add attribute’. Then, in the right hand table, select ‘Configure terms’ – see figure #3 below.
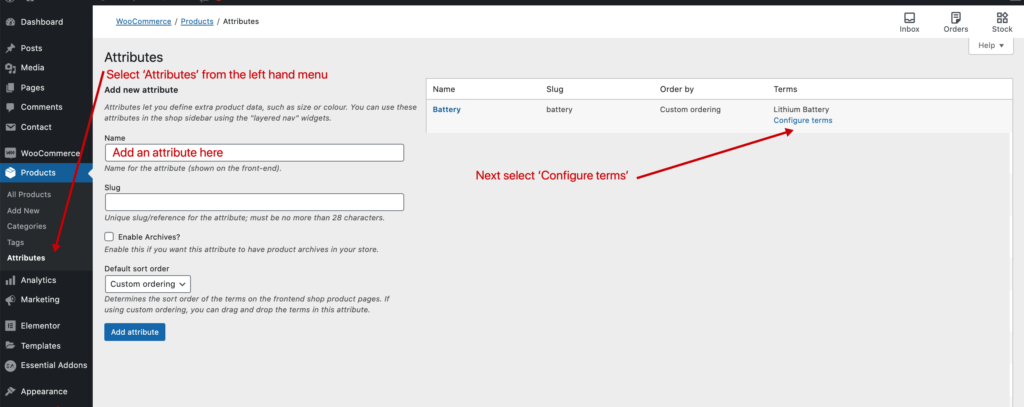
Figure #3: Adding global attribute terms
Add as many terms (values) as necessary and then when you’re done, head back to the product you were editing.
We’ll need to go back to the ‘Product data’ section of the page. Here, click the ‘Attributes’ tab and you should come to figure #4 below.
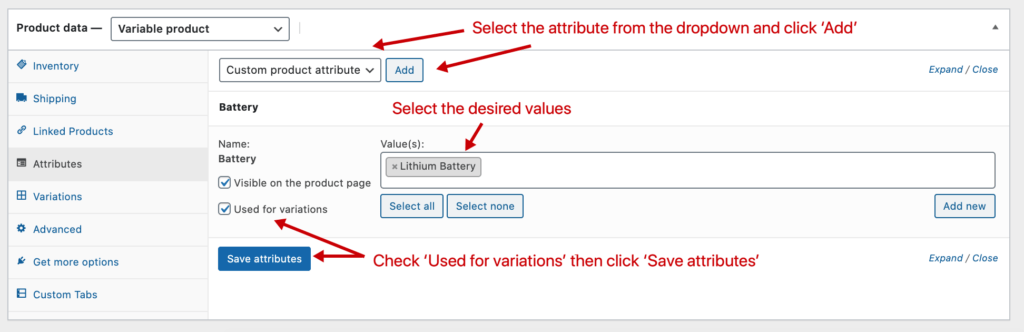
Figure #4: Adding global attributes
Click the attribute you’ve just created from the select box followed by ‘Add’.
That should bring up the attribute and allow you to add the necessary values (terms). Make sure you check ‘Used for variations’.
Once done, hit ‘Save attributes’.
Creating variations
Once you’ve added the attributes (global or local) to the product, checked the option of ‘Used for variations’ and hit ‘Save attributes’, navigate to the ‘Variations’ tab in the ‘Product data’ section.
When you’re there, either select ‘Add variation’ or ‘Create variations from all attributes’ – figure #5 below.
‘Add variation’
This will allow you to manually add a variation to the product.
‘Create variations from all attributes’
This will automatically create all the possible variations from all of the product’s attributes which have the ‘Used in variations’ checkbox checked. For example, if you have two attributes, each with 3 values, the system will create 9 different variations, because it’s creating all possible variations.
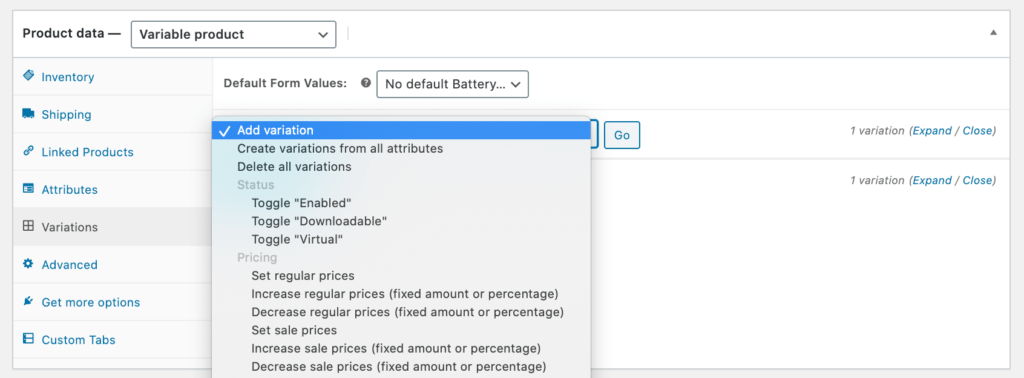
Figure #5: Adding a variation
Once you’ve either manually added a variation or automatically created them, you just need to add data as desired. Technically, the only thing you need to enter is the price, but adding an image and description is great from a customer’s perspective – see figure #6 below.
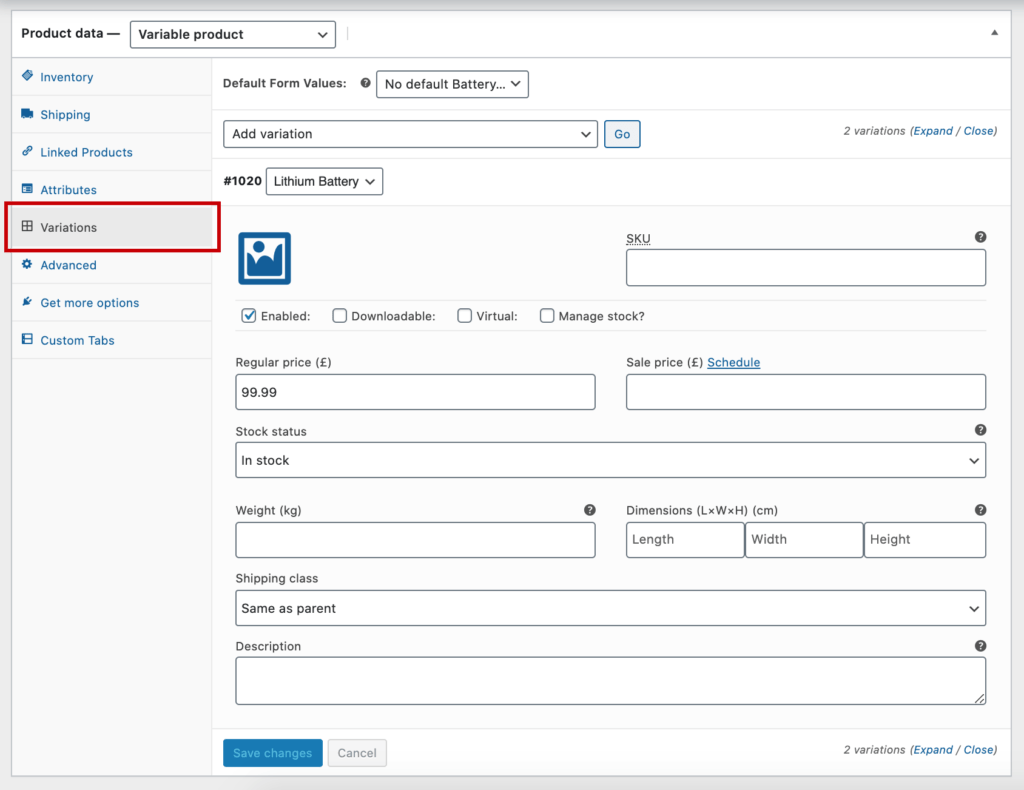
Figure #6: The variations tab
Remember to hit ‘Publish/Update’ in the top right hand corner when you’re done editing to save your work!
Congrats!