Adding & editing your pages in WordPress is very similar to adding and editing posts. That’s largely because WordPress tries to be as simple and as user-friendly as possible, meaning you have one less thing to learn!
In this guide we’ll be running through how to add a page, edit a page and delete a page.
We’ll be assuming you’ve already logged in to your admin dashboard.
Navigating to the ‘Pages’ section
To start, we need to navigate to the ‘Pages’ section.

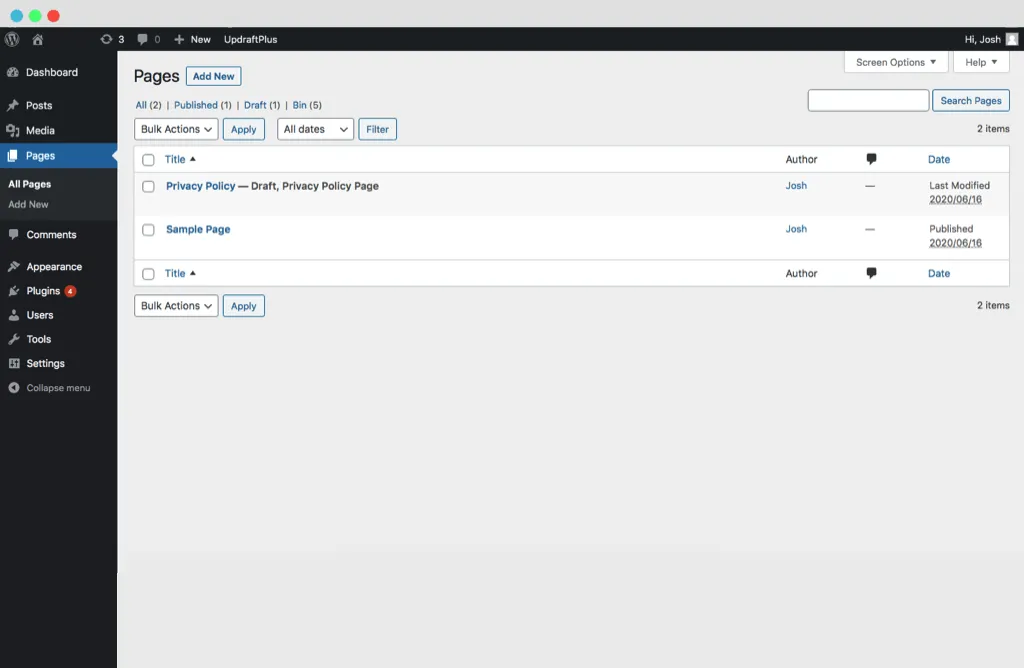
Figure #1: The ‘Pages’ section in WordPress
In the left-hand navigational menu click the option ‘Pages’. You may also click ‘All Pages’ in its sub-menu. Both options will take you to the same place – figure #1 above.
From here, you can see all the pages that are currently on your website.
Adding a new page
From within the ‘Pages’ section you’ll want to click the ‘Add New’ blue button, OR, you can select ‘Add New’ from the Page’s sub-menu in the left-hand navigational column.
Both routes will take you to the same destination – figure #2 below.

Figure #2: Adding a new page in WordPress
It’s worth noting before we continue, because it’s vital to keep your website up to date, we’re running through the guide with the Gutenberg editor (instead of the classic editor), which has been around since WordPress version 5.0.0.
Right, let’s crack on with the essential information you should include to get your page up & running and published.
The content to fill out
You’ll want to add a page title, body content and [possibly] a featured image. We use the word possibly because it’s best to consult your theme documentation or contact your web developer on this; if you’re unsure, best to skip it.
Page title
As you can imagine, this is the title of your page. We’ve highlighted where to add this in red in figure #3 below (along with the body content and featured image, but more on those later).

Figure #3: Adding a page in WordPress with annotations
Body content
This is your page’s actual content: the copy.
You just need to start typing where is says ‘Start writing or type…’ – again we’ve highlighted this in red in figure #3 above.
Featured image
Providing you do want to add a featured image, then you’ll need to select the ‘Featured image’ tab in the right hand column (see figure #3 above). Once done, click ‘Set featured image’ directly under it and you’ll be confronted with a popup – figure #4 below.
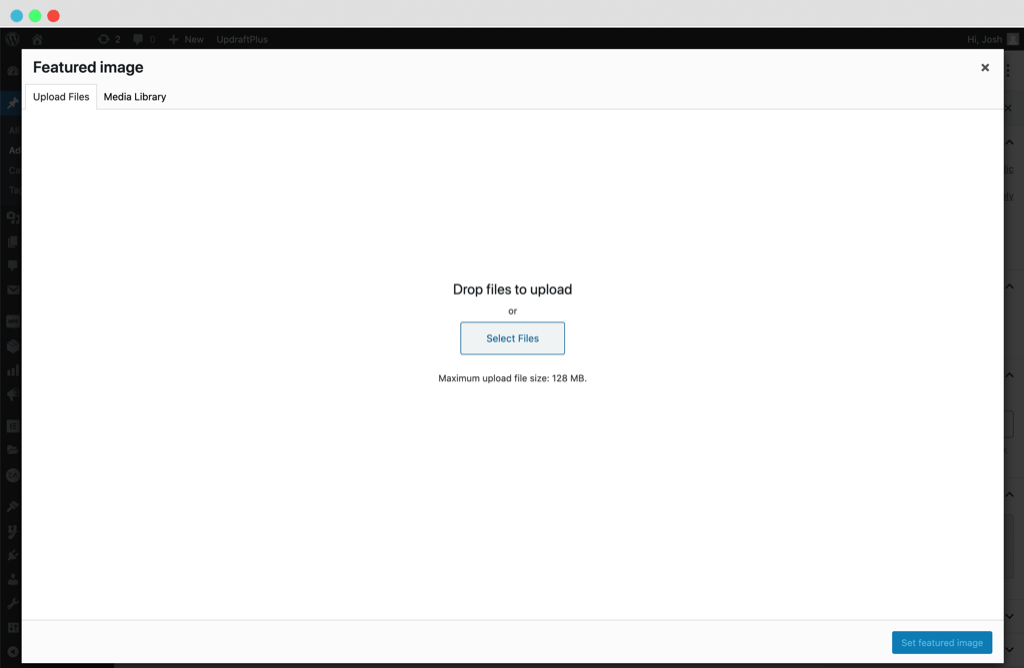
Figure #4: Uploading an image in WordPress
You can drag & drop images from your machine into this popup or you can hit the ‘Select Files’ and it will open your device’s documents.
Once you’ve dragged & dropped or selected the image, you’ll be automatically directed to the ‘Media Library’ tab (still within the popup) where you will need to click ‘Set featured image’ – the blue button at the bottom right of the screen.
Can’t see the option for Featured image?
At the top of the right-hand column, be sure you’ve got the tab ‘Document’ selected instead of ‘Block’.
Hitting publish (and saving drafts)
Once you’ve added the necessary content and are happy with it, press ‘Publish’ – the blue button in the top right-hand corner of the page – to make your page live.
Quick tip: You can press ‘Preview’ (top right) to view your work before it goes live in the front end (how your visitors will see it).
Saving drafts
WordPress saves drafts periodically. However, it’s a good practice to save drafts manually every so often incase you lose access to the page or lose connection to the internet.
To do this press the words ‘Save Draft’ in the top right hand corner of the page. Please note though, if your page has already been published, saving a draft will ‘Unpublish’ the page!
Editing a page
Once you’ve got a few pages up and running you may need to go back into them to make amends or changes.
To do this, navigate to the ‘Pages’ section (figure #1 above), hover over the page you want to edit and press the ‘Edit’ link that shows. See figure #5 below.

Figure #5: Editing a page in WordPress
To carry out the actual editing…
It works exactly the same way as we’ve just looked at above in ‘Add a new page’. Just remember to hit ‘Update’ in the top right hand corner when you’ve finished editing.
Deleting a page
You’ll need to navigate to the main ‘Pages’ section – figure #1 above.
When you’re there, hover over the page you wish to delete and click ‘Bin’, see figure #6 below.

Figure #6: Deleting a page in WordPress
Restoring a deleted page
Let’s say you’ve accidentally moved a page to the ‘Bin’.
Now, unless you restore it within 30 days it will be permantly deleted.
To restore a page, click the ‘Bin’ tab above the pages table (next to ‘All’, ‘Published’ etc). That will show you all pages that are currently in the ‘Bin’ section. Hover over the page you wish to restore and click ‘Restore’. See figure #7 below.
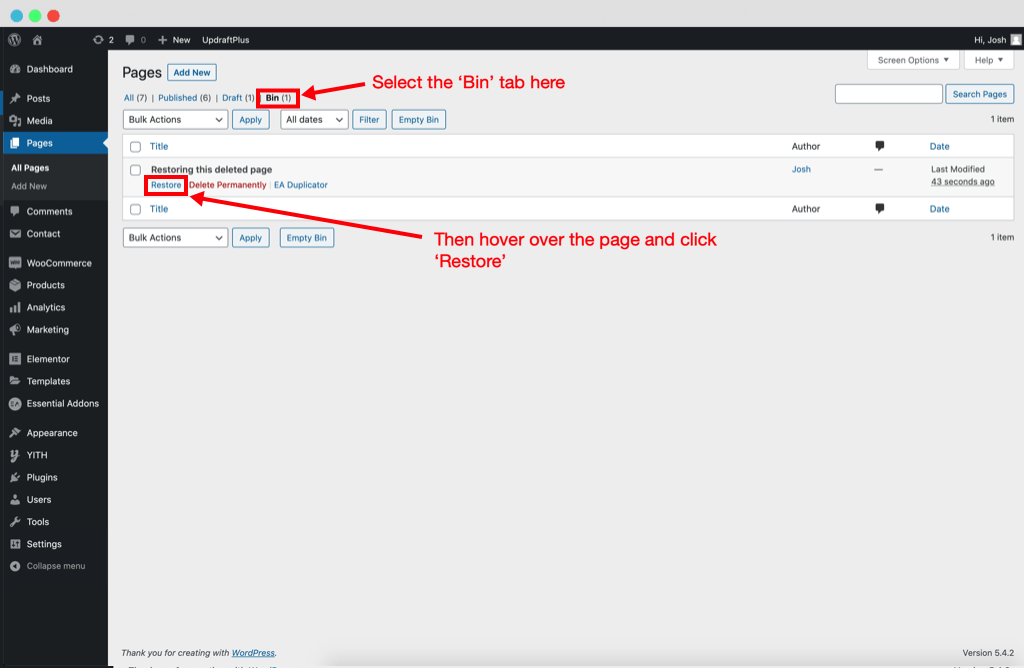
Figure #7: Restoring a deleted page in WordPress
Good luck!