Today we’re running through adding and editing a user in your WordPress website.
Why would you need to do this? You may need to add a new admin (i.e. a new support colleague) or remove access of a previous web developer/support company.
So let’s dig in. We’ll start from the admin dashboard and this article assumes you are logged in.
Navigating to ‘Users’
In the left-hand side bar, as you look down the menu you’ll see ‘Users’.
Upon hovering over ‘Users’, for simplicity click ‘All Users’ which is highlighted in red in figure #1 below.
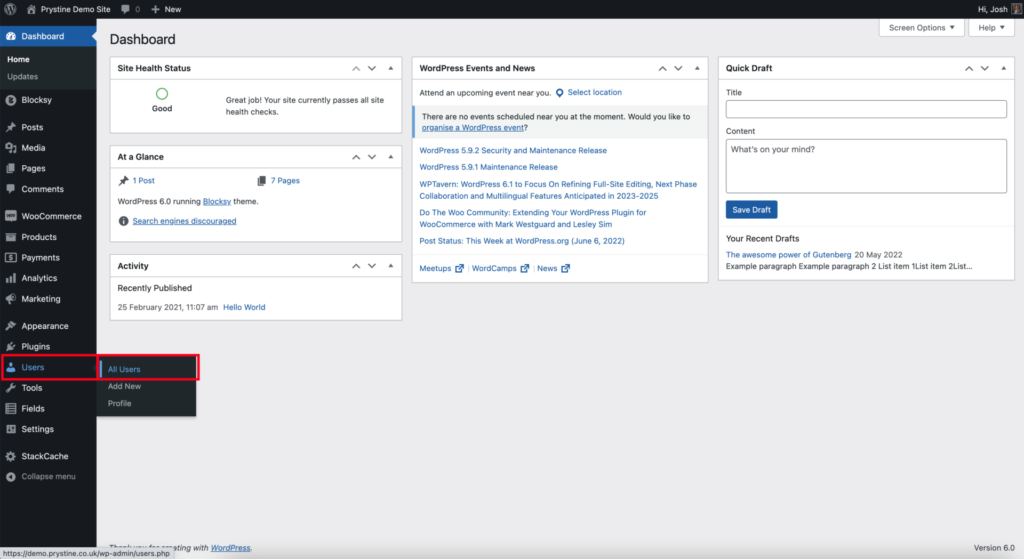
Figure #1 – Navigating to ‘Users’
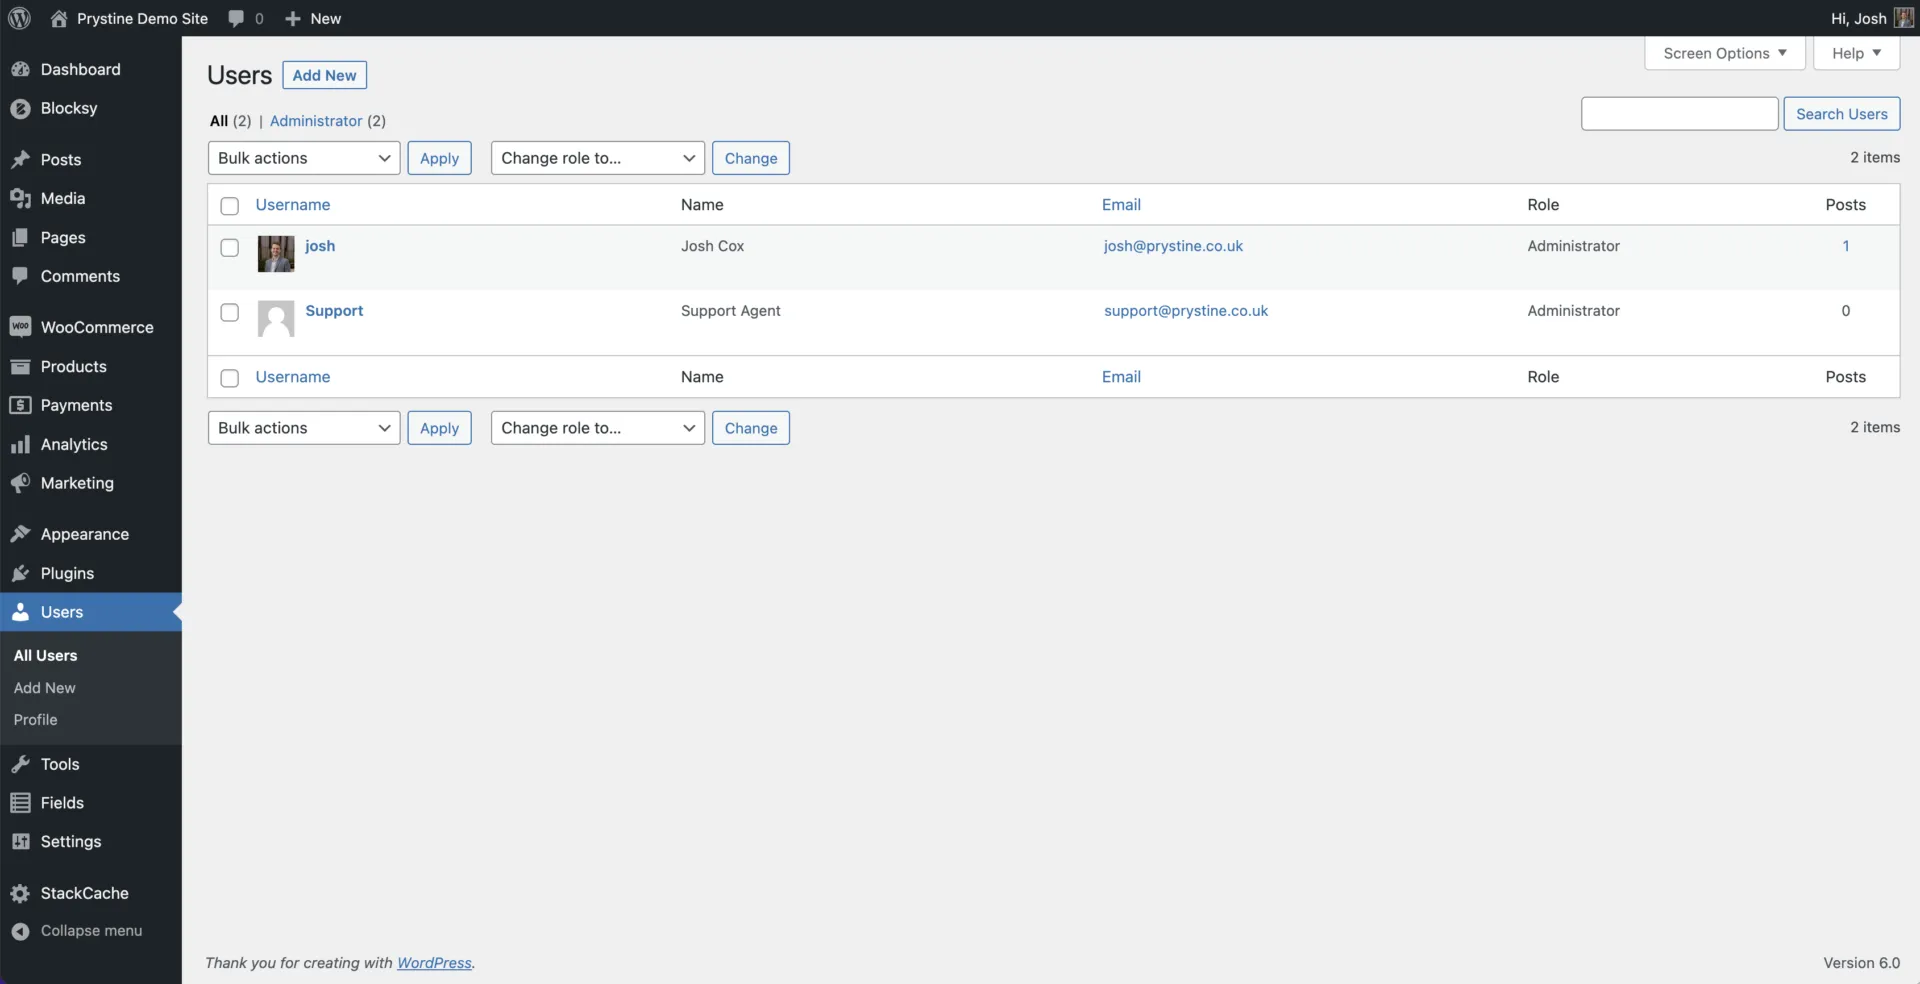
Once done, you’ll end up on a page that looks similar to figure #2 below.
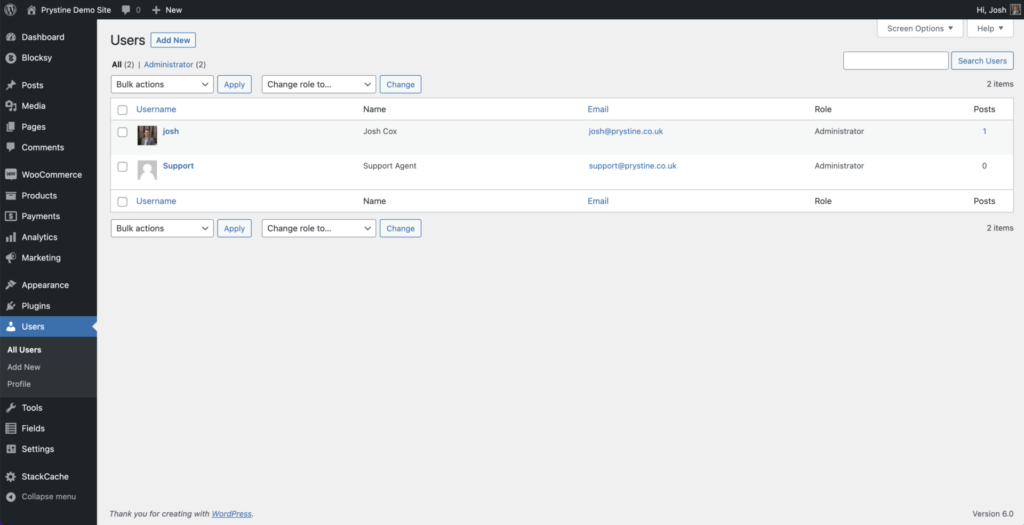
Figure #2 – The users page in the WordPress Admin panel
Adding new users
Once you’re at the ‘All Users’ page (figure #2), press the top left-hand button ‘Add New’.
That will take you through to a page that looks like figure #3 below.
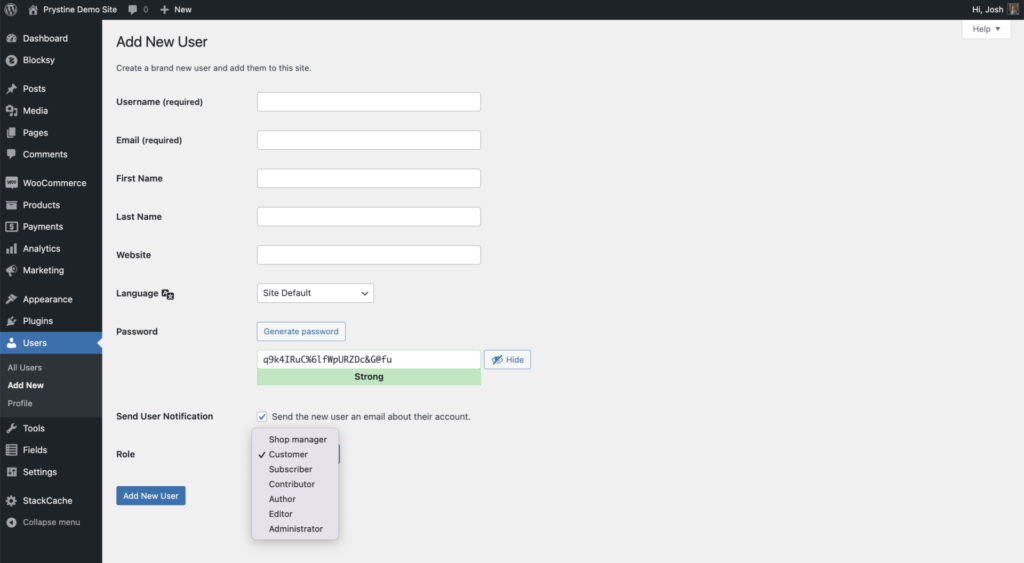
Figure #3 – Adding a new user.
Important items to fill out
The minimum inputs you’ll want to fill out are;
- Username: Which is a unique identifiable name for each user.
- Email address: The email of the individual who will receive account updates and be able to reset their password using this.
- Password: This is usually pre-filled with a randomly generated password. We advise you to leave as is and let the new user set their own password (see next bullet point).
- Send User Notification: This is normally checked by default, it will send the new user an email about their account creation and let them assign their own password via a unique link (recommended).
- Role: Select the desired role (capabilities) you want the new user to have.
- Side note, WordPress has a range of roles and capabilities which will suit different users. For further reading and a simple explanation of each default* role, see here.
*Note that some themes & plugins may add custom roles to your WordPress website.
It’s up to you if you would like to fill out the other inputs (First name, Last Name, Website etc.). They are not essential, although, may impact how your theme and plugins show user data, for example, author or customer information. At this point, it’s worth checking with your developer or plugin/theme support docs.
When you’ve filled out the relevant information, press ‘Add New User’ and you’re done!
Editing users and changing roles
From the ‘All Users’ page, hover over the account you want to edit and press ‘Edit’.
That will take you to a page that looks something like figure #4 below.
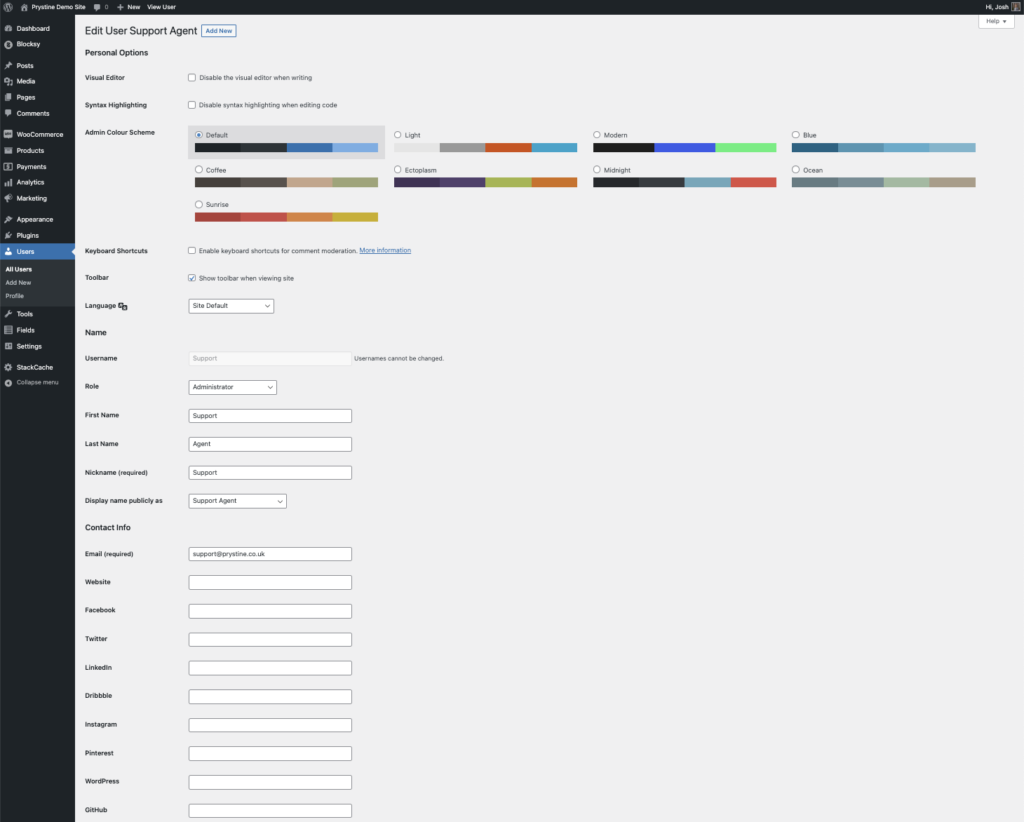
Figure #4 – Editing a user
You will have a whole host of options to edit. They’re pretty much self-explanatory, but one thing we’ll cover in detail is ‘Roles’.
What are roles?
We briefly touched on roles & capabilities earlier in the article.
Roles are like permission levels. They let your users do and manage different things, from being able to submit blog posts, to editing & publishing blog posts, to being able to edit the whole site.
A list of the default roles and capabilities can be found here.
Be careful to assign the relevant role to users in order for them to carry out their specific duties. Assigning the wrong role may leave your website vulnerable.
For example: assigning an “Editor” the role of “Administrator” means they’ll have full access to your website and will be able to do things such as installing plugins and changing themes, which may cause harm to your website.
Deleting users
From the ‘All Users’ page (figure #2), find the user you’re looking to delete, hover over them and press ‘Delete’.
If they have any posts to their account, you’ll need to assign the posts to a new user or delete them. This is a simple choice after pressing ‘Delete’.
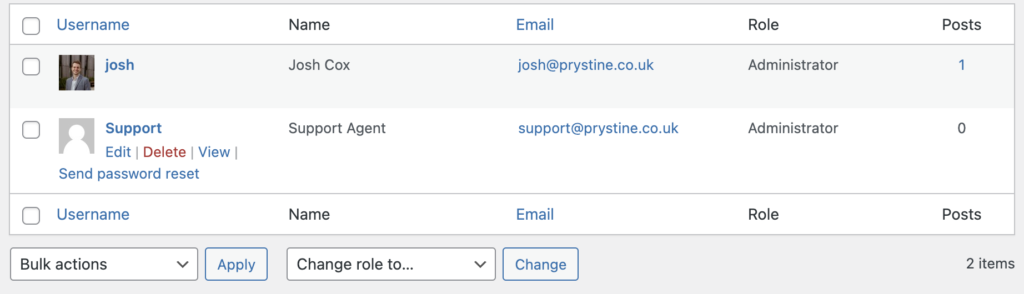
Figure #5 – Deleting a user
Congrats, you’re all set!
There are tricks and tactics to make managing users more efficient, such as bulk editing, but we’ll cover that in articles to come.