Good news, managing your menus in WordPress has never been easier!
In this article we’ll be running through, step by step, the process of adding and removing menu items such as pages and posts, as well as creating new menus.
This guide assumes you’re already logged in to your WordPress Admin Dashboard (back office) because that’s where we’ll be starting from: the dashboard.
Heading to ‘Menus’
In the left-hand navigational column, you’ll need to hover over ‘Appearance’ in order to show its sub-menu. Within that sub-menu is where you’ll find ‘Menus’.
See figure #1 highlighted in red below.

Figure #1: Navigating to Menus in WordPress
By default, on installation WordPress creates a menu for you, so first we’ll be looking at adding and removing menu items before moving on to adding additional menus.
Adding and removing menu items
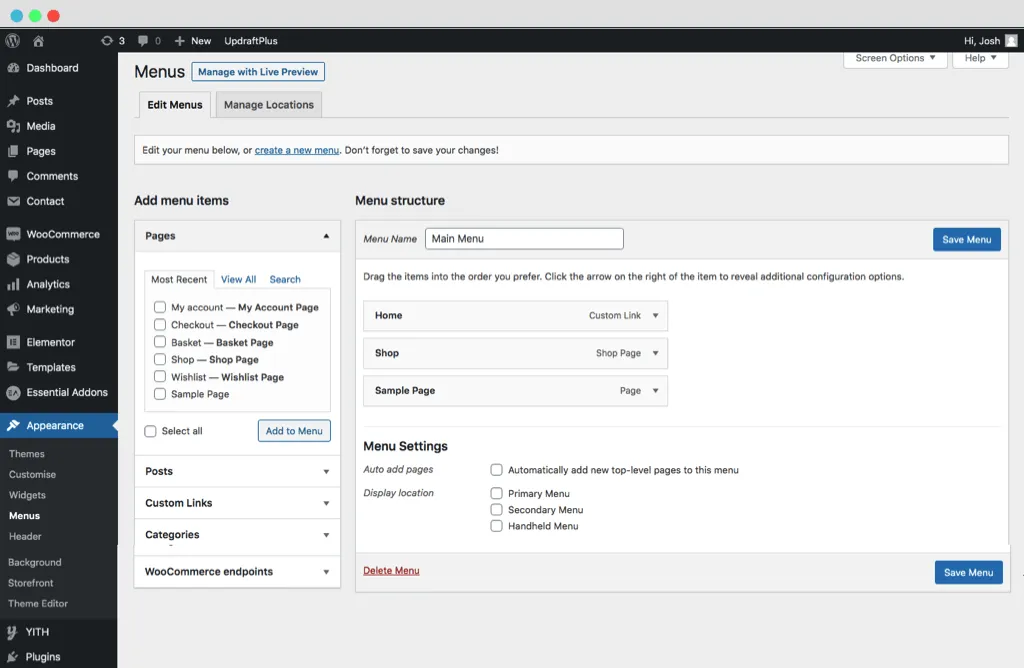
Once you’ve successfully navigated to the ‘Menus’ section, you should come to a page looking very much like figure #2 below.
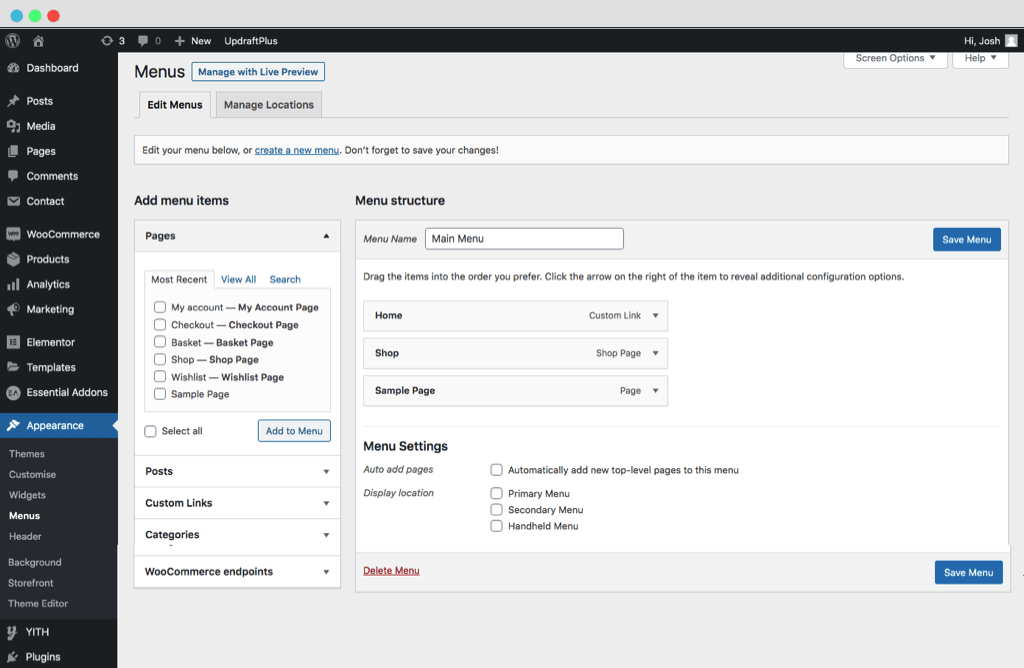
Figure #2: The ‘Menus’ page
Within this page, and excluding the far left navigational bar in black, you can see two columns. One headed by the title ‘Add menu items’ and the other headed by ‘Menu structure’.
First we’ll look at adding menu items, followed by removing them.
Adding menu items
In that left-hand column headed by ‘Add menu items’ you can see expander (accordion) tabs which contain the types of menu items you can add. These are typically:
To add items to your menu, you’ll need to first select the type of item you want (e.g. post, page, category). Then under that tab you’ll see the options of what you can place in your navigation – simply check the items you want to include then press ‘Add to Menu’. Make sure you remember to hit ‘Save Menu’ (the blue button on the right-hand side). See figure #3 below.

Figure #3: Adding menu items in WordPress
Removing menu items
In the ‘Menu Structure’ column, you’ll need to click on the menu item you want to remove which will expand and show you some options.
From these options you’ll see the word ‘Remove’ in red, click it. See figure #4 below for details.

Figure #4: Removing a menu item in WordPress
Creating a new menu
As touched upon above, when installed, WordPress creates a default menu for you automatically.
But what if your theme supports more than one menu location? Well, you’ll want to create a new menu (and assign it to the correct location), let’s see how.
Creating the menu
First up, click the link: ‘create a new menu’. Secondly, give the menu a name where it states ‘Menu Name’. Lastly click ‘Create Menu’. See figure #5 below where the steps are highlighted in red.

Figure #5: Creating a new menu in WordPress
Assigning the menu
Now that you have a new menu set up, you’ll need to assign it to a specific location within your theme.
Make sure you’ve got the right menu selected by checking if the ‘Menu Name’ is correct. If so, below the menu items you’ll see ‘Menu Setting’. Here you can check the location(s) where you want the menu to appear. Remember to hit ‘Save Menu’. See highlighted in red in figure #6 below.

Figure #6: Assigning a menu in WordPress
Good luck!